Garden Stone
The Garden Stone retaining wall system is structurally simple. It is not a walling system, it needs no mortar, wall anchoring or pin ties. The building blocks are made in the smooth, split, grind smooth and grind split surface finishes.
GRIND building blocks offer a new, highly aesthetic look, reminiscent of ancient stone walls. They are made of high-performance concrete, which looks like natural stone despite its quality. GRIND building blocks can be used for landscaping and garden design, fencing, screen walls, etc. Their rustic appearance feels completely natural in garden architecture. We supply the following elements at present.
Building with GARDEN STONE blocks is simple, as it uses locks at the bottom of each element, enabling precise laying. This automatically results in each row being set back 15 mm, producing a gentle incline against the slope and stabilising the wall. Each element only weighs 9 kg, meeting every requirement for quick and easy building.
GARDEN STONE® building blocks are designed for the creation of pleasant garden and outdoor environments. Its main use is in construction of low retaining walls. With greater ground elevation, retaining walls can be designed with multiple-stage terraces. Each terrace between the walls is then used for planting greenery.
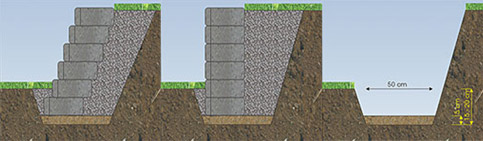
GARDEN STONE® blocks can be used to build straight, curved and arched retaining walls. The maximum wall height should not exceed 90 cm, i.e., 9 layers. GARDEN STONE® is laid in a gravel bed 5 cm high in an excavated groove 50 cm wide and 15-20 cm deep. The elements are bonded and carefully levelled throughout the construction. Do the fine levelling using a rubber mallet. The rear of the building blocks is backfilled with gravel, compacted after each layer.
GARDEN STONE® elements can be laid vertically or with a desired setback. The layers can be glued together with silicone for better cohesion.
Advantages of the Garden Stone system:
- easy manual handling
- quick construction
- environmentally friendly
- long life
- unlimited structural variability
- minimum maintenance
- highly aesthetic surface
Wall foundation execution
A thorough and strong foundation is necessary for the proper structural design and long life of your wall. Make a foundation excavation 50 cm wide and about 15-20 cm deep. At the bottom of the excavation, make a compact 5 cm laying bed of sand or gravel for laying the first, embedded wall layer.
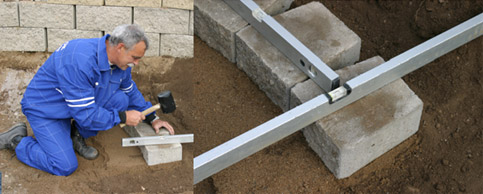
Laying the first row
Lay the elements of the first row of your retaining wall with the bottom side with the interlock in the ready sand bed foundation. Each laid element has to be carefully levelled to match both the wall level and the perpendicular. The accurate laying of the first row of Garden Stone is essential for achieving a satisfactory appearance of the whole wall. Use a rubber mallet for laying the elements in sand.
Backfilling
Make a 10-12 cm backfill of each completed layer as you build the wall. Compact each layer of the backfill by simply tamping it. This compacted backfill should extend about 30 cm behind the wall elements. The material used for the backfill has to contain sufficient coarse fraction and aggregate, ideally gravel for backfilling. Do not use ordinary earth or topsoil for the backfill. Backfilling after each completed layer is very important, including the tamping.

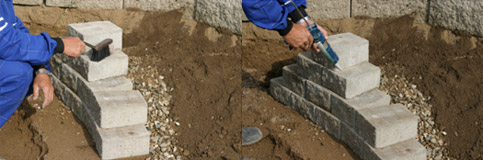
Laying other rows
Elements of each wall layer are laid with a setback that is half the element width of the layer below. Thanks to the locks at the rear of each element, this results in an interlocking of the wall layers without the use of any mortar or other stabilising elements. Then, simply lay Garden Stone elements side by side. Install the elements from the rear by engaging the lock into the rear edge of the bottom row elements and placing the visible surface facing the front. The integrated lock in each element automatically produces a stabilising setback of 15 mm of each layer. Repeat step 4 until you reach the required wall height. It should not exceed 90 cm, i.e., about 9 layers. We recommend cementing the final layer with a suitable frost-resistant cement or silicone.
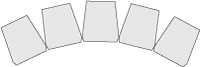 Concave wall curve
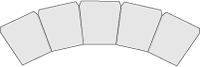 Convex wall curve
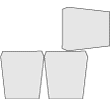
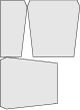 Outer corner – first layer
 Outer corner – second layer
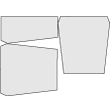
 Inner corner – first layer
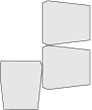 Inner corner – second layer


